Complete Bootcamp Curriculum
Want to know what’s actually inside this course? Checkout the breakdown below - that’s all 18 hours broken down!

Section 1: Welcome & Setup

Let's get you set up and comfortable before we dive in

1 Introduction
2:02
How to use the platform
access to facebook private group

Section 2: Essential Tools (3 hours 36 minutes)
Master the core Procreate interface and tools - the stuff you absolutely need to know
2:02
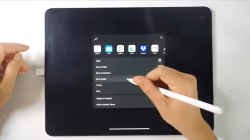
4. Navigating the Gallery – Your Project Hub in Procreate
5. Bringing In and Saving Out – How to Import & Export Your Work
5:31
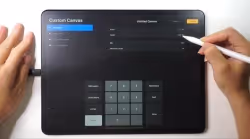
6. Setting Up Your Canvas – The First Step to Any Artwork
2:58
7. Understanding the Workspace – Tools, Menus & Where to Find Everything
2:38
8. Layer Organization - How to Tidy Up Layers and Avoid Confusion
3:57
9. Mastering Basic Layer Actions – Rename, Fill Layer, Select, and Clear
1:59
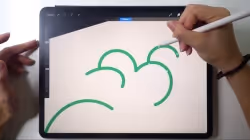
10. Drawing Perfect Shapes With QuickShape
2:08
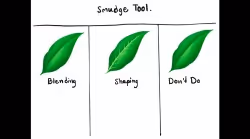
11. How to Blend Like a Pro With the Smudge Tool
3:00
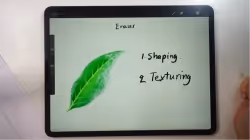
12. Using the Eraser – Clean Up Your Artwork with Precision
1:10
3:15
13. Organize Your Artwork – How to Group and Merge Layers
5:15
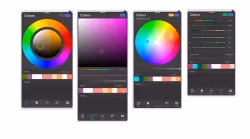
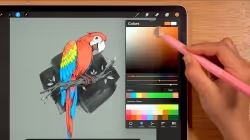
14. Unlocking the Color Panel – Modes, Tips & Palette Building
15. Move, Resize, and Rotate With the Transform Tool
3:03
5:35
16. Isolate and Edit With the Selection Tool

17. ✍️ Practice Perfect Shapes – QuickShape Exercise
49:13

18. ✍️ Blend and Clean – Smudge & Eraser Practice
37:06
19. ✍️ Color Like a Pro – Practice 4 Easy Ways to Fill Color
37:50

20. ✍️ Masking Made Easy – Practice Alpha Lock, Layer Mask & Clipping Mask
17:04
39:06
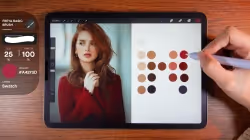
21. ✍️ Learn to Pick Colors from Photos – A Practical Palette Exercise
Section 3: Practical Application (6 hours 37 minutes)
Where you'll create real art while learning
12:18
22. ✍️ 5 Fun Ways to Recolor Your Artwork
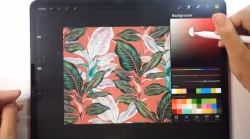
23. ✍️ Create a Simple Pattern Using Transform & Selection Tools
5:06

23:58
24. ✍️ Create a Collage Look Using Transform & Selection Tools

18:40
25. ✍️ Create 3D-Looking Lettering With the Smudge Tool
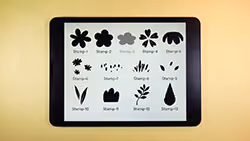
26. ✍️ Create Your Own Solid Stamp Brushes (Landscape Theme)
47:00
1:15:12
27. ✍️ Create a Playful Landscape – Easy Step-by-Step Exercise
28. ✍️ Create a Rubber Stamp Brush Using Layer Mask
32:49

36:22
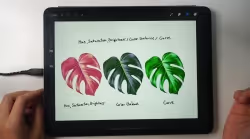
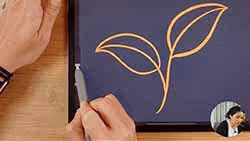
29. ✍️ Create a Repeating Leaf Pattern From Scratch
30. ✍️ Photo Manipulation – Create a Surreal Floating Woman Scene
2:24:22

3:56
31. ✍️ Learn Reference Layers & Color Fill – Practice Exercise

Section 4: Advanced Features (46 minutes)
Master pro touches with professional tools that make everything look better
3:03
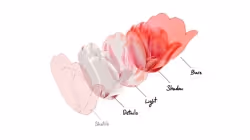
32. Light, Shadow & Texture – Exploring Blend Modes in Procreate
33. Invert Colors on a Layer – Create Cool Effects With One Tap
2:09

1:39
34. Fade or Bold – Learn to Control Opacity for Better Effects

2:57
35. How to Blur in Procreate – Add Depth & Atmosphere
36. Make it Textured – How to Use Noise in Procreate
2:48
37. Make Your Details Pop – How to Use the Sharpen Tool
1:35

38. Swirl & Flow – Learn Liquify by Making Pretty Marble Art
4:56

39. How to Use Clone Tool – Duplicate Textures & Fix Flaws
2:07
40. Get the Perfect Look – Color Editing Basics with HSB, Balance & Curves
4:14
41. Unlocking Visual Effects - Mastering Gradient Map, Bloom, Glitch & More
7:14
42. ✍️ Practice 4 Easy Ways to Create Beautiful Gradients
9:42

43. ✍️ Create a Shiny Iridescent Background
6:17

Section 5: Workflow Mastery (2 hours 8 minutes)
Speed up your process and stay organized

1:34
44. Bringing in Images – Insert Files or Photos to Work With
1:50
45. Draw with References – Add Private Photos & Canvas View
46. Use Canvas Reference for Face Painting and Overlay Art
3:06
47. Move Art Between Canvases – Cut, Copy, Paste & Copy Canvas
2:05

48. Adjust Canvas Size – Trim or Expand Your Workspace
3:03
3:08
49. Make Comics, Journals, or Storyboards With Page Assist
50. Bring Your Art to Life – Getting Started With Animation Assist
6:27
51. Understanding Onion Skin Color – See Your Animation Frames Clearly
1:50

52. Edit Drawing Guide for Accurate Grids & Perspective
3:28

53. Make Perfect Reflections With the Symmetry Drawing Guide
3:40
54. Get Your Art Out of Procreate – Share, Save, and Send
2:30

55. Export Your Layers – Turn Them Into Images, PSDs, or Animations
1:45

2:56
56. Record Your Drawing Process – Procreate Timelapse & iPad Screen Recording
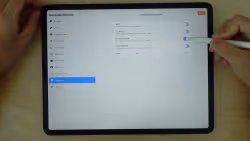
57. Procreate General Settings – Customize Your Interface & Tools
2:50
8:43
58. Gesture Controls Explained – Set Up Your Favorite Shortcuts

4:46
59. Helpful Settings and Features You Might’ve Missed – Language & More

60. ✍️ Make a Moving Image With Symmetry + Animation Tools
7:11
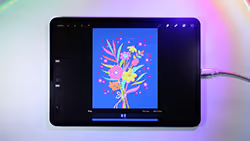
1:11:50
61. ✍️ Animate a Blooming Bouquet With Color-Changing Brushes

Section 6: Art Foundations (1 hours 53 minutes)
Foundation skills for any style you want to try
62. ✍️ Shading Basics – Practice Brush Pressure & Color Transitions
6:16

63. ✍️ Realism With Simple Shapes – Light, Form & Shadow
25:09

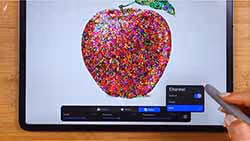
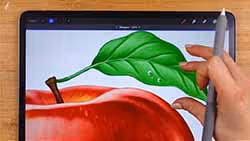
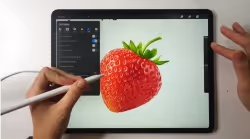
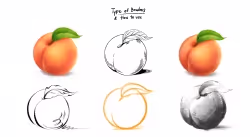
64. ✍️ Painting an Apple – Build Realism With Texture and Depth
37:30

38:29
65. ✍️ Creating a Realistic Daisy – Speed Up Your Work With Symmetry

Section 7: Creative Features (2 hours 31 minutes)
Explore Procreate's unique features
Bonus 1.1: Add and Edit Text in Procreate
6:16
22:19
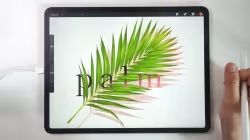
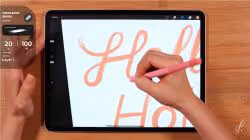
Bonus 1.2: ✍️ Sketch Your AR Pop-Up Lettering – “Hello, Hola, Hallo”

68:20
Bonus 1.3: ✍️ Create the Final Lettering for Your AR Pop-Up Design

Bonus 1.4: ✍️ Create Animation Layers for Your AR Pop-Up Lettering
50:46
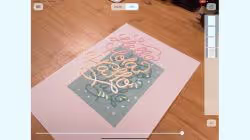
Bonus 1.5: ✍️ Bring Your Lettering to Life With Pop-Up AR in Procreate
4:27

Section 8: Brush Customization (1 hour 12 minutes)
Create custom brushes that work exactly how you want
3:05
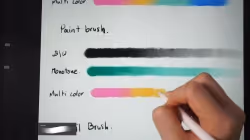
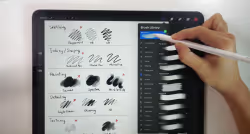
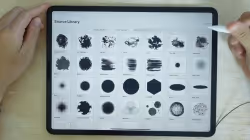
Bonus 2.1: Get to Know Procreate’s Brushes – From Sketching to Painting
Bonus 2.2: Create a Personalized Brush Set for Your Workflow
3:36

6:11
Bonus 2.3: Make Your Brushes Flow With Pressure and Smoothing
4:07
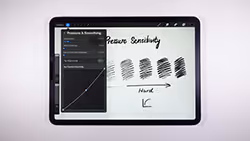
Bonus 2.4: Make Your Strokes Feel Natural – Set Up Pressure Sensitivity

3:38
Bonus 2.5: How to Use Brush Stabilization for Clean, Confident Strokes

Bonus 2.6: Dynamic Brush Scaling – Keep Your Brush Consistent at Any Zoom Level
1:59
Bonus 2.7: Save Your Favorite Brush Sizes for Quick Access
2.50

0:37
Bonus 2.8: Activate Brush Cursor for Better Accuracy
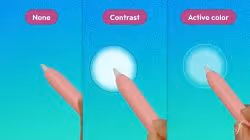
Bonus 2.9: Change the Look of Your Brush Cursor in Procreate
3:11
Bonus 2.10: Use Hover to Test Brush Size, Shape & Angle Before Drawing
3:28
Bonus 2.11: Adjust Brush Size & Opacity With Hand Gestures in Procreate
3:04

4:32
Bonus 2.12: Create Your Own Procreate Brush From Scratch

Bonus 2.13: Stroke Path Settings – Control Flow, Spacing & Smoothness
2:09

1:57
Bonus 2.14: Taper Settings – Control Stroke Start, End & Flow
Bonus 2.15: Shape Settings – Define the Look and Flow of Your Brush Tip
2:27

4:43
Bonus 2.16: Grain Settings – Add Texture and Flow to Your Brush Strokes
Bonus 2.17: Rendering Settings – Control How Your Brush Reacts to Light and Color
2:28

3:45
Bonus 2.18: Wet Mix Settings – Control How Your Brush Blends Like Paint
Bonus 2.19: Color Dynamics Settings – Add Hue, Saturation & Randomness
to Your Strokes
4:00

1:07
Bonus 2.20: Dynamics Settings – Control Speed, Jitter, and Motion in Your Strokes
Bonus 2.21: Apple Pencil Settings – Control Pressure, Tilt & Brush Response
3:14
2:19
Bonus 2.22: Properties Settings – Set Brush Limits, Size, and Preview Appearance

Bonus 2.23: Materials Settings – Control the Feel of Your Brush on 3D Surfaces
6:44
1:28
Bonus 2.24: About This Brush – Add Info, Sign Your Brush & Lock Settings

Section 9: 3D Features (10 minutes)
Future-proof your skills
Bonus 3.1: How to Import a 3D Model into Procreate
3:37
1:35
Bonus 3.2: Understanding 3D Mode and 2D View – Paint From All Angles
3:25
Bonus 3.3: Set the Scene – Customize 3D Lighting and Environment

1:25
Bonus 3.4: See Your 3D Art in the Real World With AR View
